
功能介绍:调用 “ 彩虹屁 ” API,定时向发送邮箱发送email,实现自动化😂
知识准备:
spring boot框架的mail邮件,cron表达式,远程创建客户端对象发送请求、获取信息,JSON处理......
实现该功能的步骤如下:
1. maven依赖
新创建一个空的maven项目,pom文件导入以下依赖和插件:
<parent>
    <groupId>org.springframework.boot</groupId>
    <artifactId>spring-boot-starter-parent</artifactId>
    <version>2.6.6</version>
    <relativePath/>
</parent>
<dependencies>
    <!--email支持-->
    <dependency>
        <groupId>org.springframework.boot</groupId>
        <artifactId>spring-boot-starter-mail</artifactId>
    </dependency>
    <dependency>
        <groupId>org.springframework</groupId>
        <artifactId>spring-context-support</artifactId>
    </dependency>
    <!-- httpclient 依赖 -->
    <dependency>
        <groupId>org.apache.httpcomponents</groupId>
        <artifactId>httpclient</artifactId>
        <version>4.5.12</version>
    </dependency>
    <!--处理JSON-->
    <dependency>
        <groupId>com.alibaba</groupId>
        <artifactId>fastjson</artifactId>
        <version>1.2.9</version>
    </dependency>
</dependencies>
<!--maven打包插件-->
<build>
    <plugins>
        <plugin>
            <groupId>org.springframework.boot</groupId>
            <artifactId>spring-boot-maven-plugin</artifactId>
            <configuration>
                <fork>true</fork>
            </configuration>
        </plugin>
    </plugins>
</build>
2. 配置文件
在resource目录下新建一个application.yml文件,配置信息如下:
spring:
  mail:
    username: xxx你的邮箱xxx.com
    password: xxx16位SMTP|POP3协议授权码xxx   #下文展示如何获取
    host: smtp.163.com    #我用的网易邮箱,QQ邮箱为smtp.qq.com
    properties:
      mail:
        smtp:
          auth: true
    port: 465    #网易端口为465,QQ端口为587
    protocol: smtps

she:
  mail: xxx收件人邮箱xxx.com   #如果多个收件人,在后面添加逗号,再继续添加
如何获得授权码,参考以下文章:
网易邮箱获取:请点击→网易获取授权码方法
QQ邮箱获取:请点击→QQ获取授权码方法
3. SpringBoot启动类
@EnableScheduling
@SpringBootApplication
public class BiaoBaiApp {
    public static void main(String[] args) {
        SpringApplication.run(BiaoBaiApp.class,args);
    }
}
4. 主要功能类
自动发送类:
@Component
public class SendMessage {
    @Autowired
    private JavaMailSender mailSender;
    @Value("${spring.mail.username}")
    private String from;
    @Value("${she.mail}")
    private String[] sheMail;
    public void sendMessage(String subject,String message) {
        try {
            MimeMessage mimeMessage = mailSender.createMimeMessage();
            MimeMessageHelper helper = new MimeMessageHelper(mimeMessage);
            helper.setFrom(new InternetAddress(from, "这里填写你的用户名或昵称"));//发送者邮箱
            helper.setTo(sheMail);//收邮件者邮箱
            helper.setSubject(subject);//发件主题
            helper.setText(message,true);//发件内容
            mailSender.send(helper.getMimeMessage());//发送邮件
        } catch (MessagingException e) {
            e.printStackTrace();
        } catch (UnsupportedEncodingException e) {
            e.printStackTrace();
        }
    }
    /**远程获取要发送的信息*/
    public static String getOneS(){
        try {
            //创建客户端对象
            HttpClient client = HttpClients.createDefault();
           //接口地址
            HttpGet get = new HttpGet("https://api.shadiao.app/chp");
            //发起请求,接收响应对象
            HttpResponse response = client.execute(get);
            //获取响应体,响应数据是一种基于HTTP协议标准字符串的对象
            //响应体和响应头,都是封装HTTP协议数据。直接使用可能出现乱码或解析错误
            HttpEntity entity = response.getEntity();
            //通过HTTP实体工具类,转换响应体数据
            String responseString = EntityUtils.toString(entity, "utf-8");

            return responseString;

        } catch (IOException e) {
            throw  new RuntimeException("网站获取句子失败");
        }
    }
}
定时任务类:
@Component
public class MyScheduled {
    @Autowired
    private SendMessage sendMessage;
    /*定时执行任务方法 每天5点20执行该任务*/
    @Scheduled(cron ="0 20 5 * * ?")
    public void dsrw() {
        String message = sendMessage.getOneS();
        Map<?, ?> map = JSON.parseObject(message, Map.class);
        String text = (String) ((Map<?, ?>) map.get("data")).get("text");
        sendMessage.sendMessage("(这里是邮件题目,自定义)", text);
    }
}
cron表达式语法:
{秒数} {分钟} {小时} {日期} {月份} {星期} {年份(可为空)}
经典案例:
“30 * * * * ?” 每半分钟触发任务
“30 10 * * * ?” 每小时的10分30秒触发任务
“30 10 1 * * ?” 每天1点10分30秒触发任务
“30 10 1 20 * ?” 每月20号1点10分30秒触发任务
“30 10 1 20 10 ? *” 每年10月20号1点10分30秒触发任务
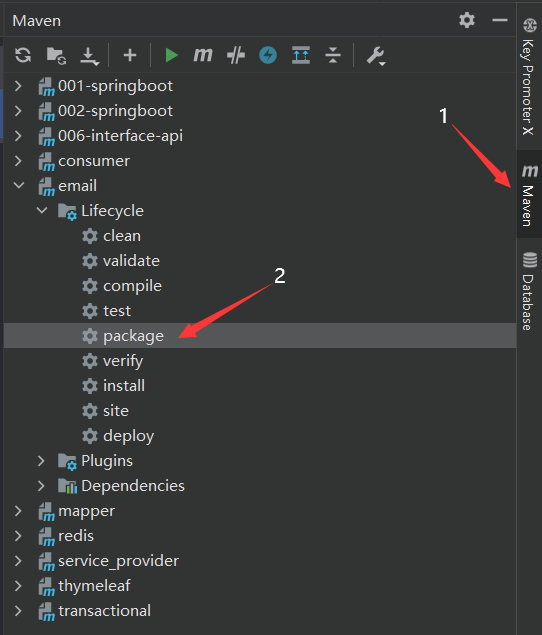
5. 打包部署
-
Maven打包
生成的jar包:

-
部署到linux服务器(2、3选其一)
第一步,上传该jar包
第二步,java后台运行jar包,命令:
nohup java -jar 你的jar包名字.jar >temp.txt 2>&1 & -
部署到windows
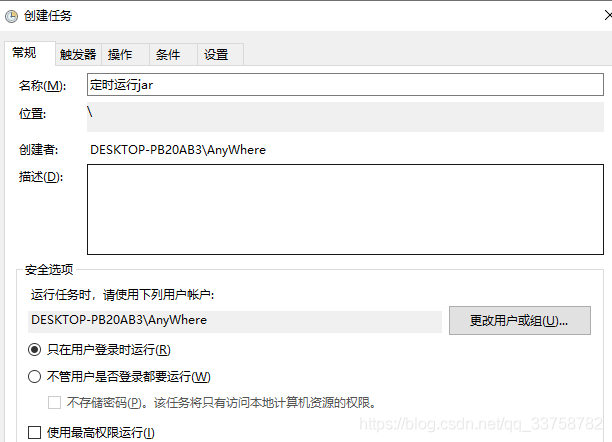
第一步:依次点击找到 “我的电脑”→鼠标右键 “管理”→“定时任务”→“定时任务库”→“创建”
-
创建任务
-
新建触发器

-
新建操作

点击确定后,变创建好新建的任务了
-
6. 结果

感兴趣的话,就搞起来!😂